Apple Pay
Make your payments easily and securely using your Apple device with Face ID or Touch ID.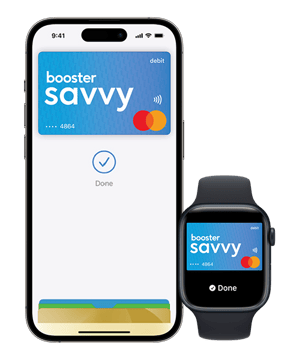
Free to download
There’s no charge to download the Booster NZ app, and Booster won’t charge any extra when you use your phone to pay in New Zealand – though international transaction and FX fees apply. Savvy isn’t involved in any surcharge merchants may apply.
Safe and secure
Apple Pay keeps your card details safe. The card details are never stored on your phone or shared with merchants.
Convenient
With Apple Pay, you can make purchases using just your Apple device, anywhere you can tap and pay. That means you can use it at stores in New Zealand and overseas.

Step 1: Log in to the Booster NZ app. Select Savvy and then Card from the top navigation. Tap the Add to Apple Wallet button.

Step 2: Follow the prompts in the Apple Wallet app to confirm your details.

Step 3: Done! You’re ready to make your first payment.
Apple Pay
To use Apple Pay you’ll need:
- a Savvy card
- a compatible Apple device with iOS version 13.4 or later
- the Booster NZ app on a supported operating system.
Compatible devices
For a list of models compatible with Apple Pay, and where you can use them for your purchasing, see support.apple.com.
The Booster NZ app is designed for iOS mobile devices with internet access.
iPad and iPhone devices
To use the latest version of the Booster NZ app for iPad and iPhone, you’ll need to have iOS version 13.1 or later.
We recommend updating to the most recent operating system version available for your device, to ensure it’s secure and has access to our latest features and improvements. The Booster NZ app may work on older unsupported operating systems, but we can’t guarantee support if you have issues.
To check what version of iOS your device is currently running:
- Tap Settings.
- Select General.
- Select About.
To update to the latest iOS version, follow the instructions on Apple support.
To set up Apple Pay, you’ll need to have a passcode, Touch ID or Face ID, enabled on your compatible device. You’ll also need to be connected to the internet and signed in to an iCloud account.
Follow the steps below:
iPhone
Using the Booster NZ app:
You’ll need the latest version of the Booster NZ app to add your card to Apple Pay. You can update or download this from the App Store.
- Log in to the Booster NZ app
- Open Savvy
- Tap Card
- Add to Apple Wallet. Tap Next
- Read the terms and conditions then tap Agree to confirm
Using the Wallet app:
- Open the Wallet app.
- Tap the plus (+) icon in the upper-right corner.
- Follow the steps to add a new card. If you’re asked to add the card that you use with iTunes, just enter its security code.
- Read the terms and conditions then tap Accept to confirm.
- Verify your card by entering the code that is sent to you.
- Once your card is verified, tap Confirm to add your card to Apple Pay.
Apple Watch
- Open the Watch app on your iPhone.
- Go to the My Watch tab.
- Scroll down and tap Wallet & Apple Pay.
- Follow the steps to add a card. If a card is already on your iPhone, tap Add next to the card. To add a new card, tap Add Credit or Debit Card. If you’re asked to add the card that you use with iTunes, just enter its security code. Tap Next.
- Once we’ve verified your card, tap Confirm to add your card to Apple Pay.
iPad
Using the Booster NZ app:
- Log in to the Booster NZ app.
- Open Savvy
- Tap Card
- Select Add to Apple Wallet. Tap Next
- Read the terms and conditions then tap Agree to confirm
Using the Wallet app:
- Open Settings.
- Scroll down and tap Wallet & Apple Pay.
- Tap Add Credit or Debit Card.
- Follow the steps to add a new card. If you’re asked to add the card that you use with iTunes, just enter its security code.
- Verify your card by entering the code that is sent to you.
- Once we’ve verified your card, tap Confirm to add your card to Apple Pay.
MacBook Pro with Touch ID
- Open System Preferences.
- Select Wallet & Apple Pay.
- Select Add Card or the plus (+) icon.
- Follow the steps to add a new card. If you’re asked to add the card that you use with iTunes, just enter its security code.
- Tap Next. We’ll verify your information.
- Once we’ve verified your card, tap Confirm to add your card to Apple Pay.
Please note: If you purchase a new iPhone, Apple Watch, iPad or MacBook, you must add your cards to Apple Pay again.
Remember that you must remove any Savvy cards from your Apple device, before selling or giving it to someone else.
You can use Apple Pay wherever you see these symbols:
![]()
Paying in stores
On iPhone with Touch ID:
- Rest your finger on Touch ID. If you don’t have Touch ID enabled, you can enter your passcode instead.
- Hold your iPhone up to the contactless terminal.
- Your iPhone will display Done to indicate the terminal has received your transaction. The terminal will then indicate if the transaction has been successful.
- If you’re making a payment that’s more than $200, you may be prompted to enter your PIN to complete the transaction.
On iPhone with Face ID:
- Double click the side button.
- Glance at your screen.
- Hold your iPhone up to the contactless terminal.
- Your iPhone will display Done to indicate the terminal has received your transaction. The terminal will then indicate if the transaction has been successful. (For some transactions over $200, you may be prompted to enter your card PIN to complete the transaction).
On Apple Watch:
- Double-click the side button.
- Scroll to choose a card.
- Hold your Apple Watch within a few centimeters of the contactless card reader, with the display facing the reader.
- A gentle tap and beep confirm that the payment information was sent. You receive a notification in Notification Center when the transaction is confirmed.
Paying in apps
You can use your iPhone, iPad, and Apple Watch to pay in apps.
- Select Apple Pay as the payment method at checkout.
- To confirm payment on iPhone and iPad, place your finger on Touch ID or enter your passcode. On Apple Watch, just double-click the side button.
- Your device will display Done to indicate the terminal has received your transaction.
Paying on the web
You can use your iPhone, iPad, and MacBook Pro with Touch ID to pay on websites. Macs without Touch ID will require you to complete the purchase with your iPhone or Apple Watch.
- Select Apple Pay as the payment method at checkout.
- Your default card will appear. To pay with a different card, tap the > icon on your iPhone or iPad, or the Expand icon on your MacBook Pro.
- To confirm payment on iPhone and iPad, place your finger on Touch ID or enter your passcode. On MacBook Pro, follow the prompts on the Touch Bar and place your finger on Touch ID to confirm. If Touch ID is off, tap the Apple Pay icon on the Touch Bar and follow the prompts. Your device will display Done to indicate the transaction has been successful.
Apple Pay works anywhere contactless payments are accepted. You can use it to pay wherever you see these symbols:
![]()
We recommend you take your Savvy card as a backup when travelling overseas, and let us know before you go so we can protect your cards and transactions better while you’re away.
Let us know before you go.
To view your 10 most recent Apple Pay transactions:
- Open the Wallet app
- Tap on your Savvy card
- Tap on the Info icon in the bottom-right corner of your screen
- Then tap Transactions.
Transaction history is not available on Apple Watch.
For a full list of all your transactions, log in to Savvy and see your stacks.
The first card you add to Apple Pay will automatically become your default card. Transactions will be debited from the account linked to your default card, unless you select a different card for that transaction.
iPhone or iPad
- Open Settings
- Scroll down and tap Wallet & Apple Pay
- Under Transaction Defaults, tap Default Card
- Select the Savvy card.
Tip: You can also change the default card on your iPhone by opening the Wallet app and dragging your Savvy card to the front of your cards.
Apple Watch
- Open the Watch app on your iPhone
- Go to the My Watch tab
- Scroll down and tap Wallet & Apple Pay
- Under Transaction Defaults, tap Default Card
- Select the Savvy card.
MacBook Pro with Touch ID
- Open System Preferences
- Select Wallet & Apple Pay
- Select the Savvy card.
If you turn off your passcode or Touch ID, or sign out of iCloud, your credit and debit cards will automatically be removed from your device. You can always add them again at a later date.
iPhone
From the Wallet app:
- Open the Wallet app
- Select the card you’d like to remove
- Tap on the Info icon at the bottom-right corner of your screen
- Tap Remove Card at the bottom of your screen.
From Settings:
- Open Settings
- Scroll down and tap Wallet & Apple Pay
- Select the card you’d like to remove
- Tap Remove Card at the bottom of your screen.
Apple Watch
- Open the Watch app on your iPhone
- Go to the My Watch tab
- Scroll down and tap Wallet & Apple Pay
- Select the card you’d like to remove
- Tap Remove Card at the bottom of your screen.
iPad
- Open Settings
- Scroll down and tap Wallet & Apple Pay
- Select the card you’d like to remove
- Tap Remove Card at the bottom of your screen.
MacBook Pro with Touch ID
- Open System Preferences
- Select Wallet & Apple Pay
- Select the card you’d like to remove
- Click the minus (–) icon to remove the card.
You can easily suspend or permanently remove the ability to pay from your device with Apple Pay by putting your device in Lost Mode using Find My iPhone on iCloud.com. You can do this even if your device is offline and not connected to a cellular or Wi-Fi network.
Alternatively, you can call us right away on 0800 336 338 and we’ll suspend or delete your Savvy card from Apple Pay. You’ll still be able to use your plastic Savvy card to pay.
Putting your device in Lost Mode
- Sign in to icloud.com/find on a Mac or PC, or open the Find My iPhone app on another iPhone, iPad, or iPod touch.
- Click on Find iPhone. Under All Devices, select the device that’s been lost or stolen.
- Turn on Lost Mode. The ability to make payments using Apple Pay on this device will now be suspended. If you find your device and take it out of Lost Mode, your cards will automatically be added back to Apple Pay.
Visit Apple’s website for more information on how to lock and track your device in Lost Mode.
Using Apple Pay with your Savvy card is private and secure. Apple Pay is designed to protect your personal information, transaction data, credit and debit card information with industry-leading security.
Authorising payments- Every time you make a purchase, you’ll need to authorise the payment via Face ID, Touch ID or your passcode.
- Your card details are never shared with merchants or stored on your device.
- Apple doesn’t store or have access to any of the credit or debit card details you add to Apple Pay.
- When you pay in apps or a web browser, the merchant will only receive information such as your name, email address, billing and shipping addresses that you authorise to share in order to fulfil your order.
- To help ensure the security of Apple Pay, you must have a passcode or Touch ID set on your device.
- Do not share your passcode with anyone, including your family members.
- Ensure no-one has their fingerprint registered to your device while your card is registered in Apple Pay.
- If you experience unusual activity while using Apple Pay with your Savvy card, please contact us straight away on 0800 336 338.
- Visit Apple’s website for more information on Apple Pay security.